Table Of Content
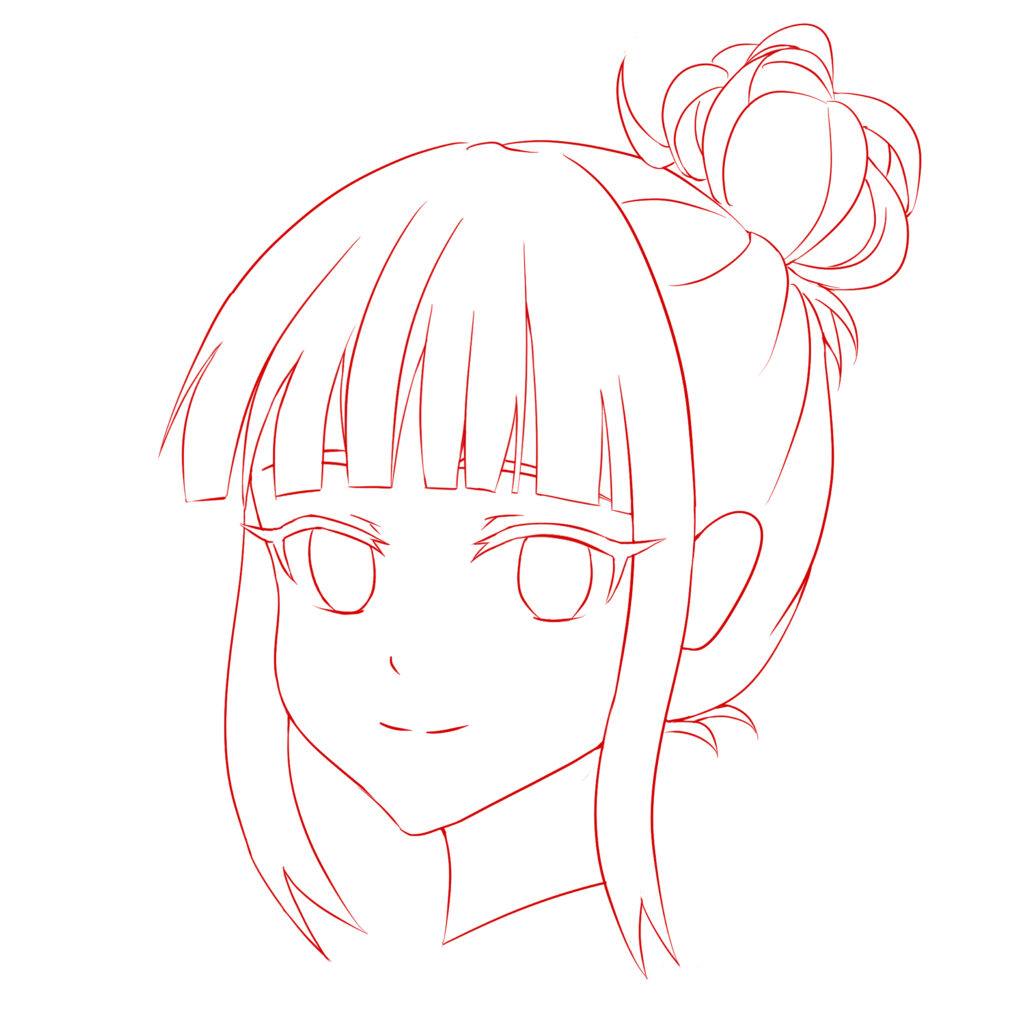
You can also add them in over top of the pencil shading using a white correction pen. A triangular, or oval-triangular shape would work best to create the anime vibe. The shape of the sketch should be as symmetrical as possible, especially since the portrait is face-on.
This AI Lets You Create Custom Anime Characters in Seconds - Interesting Engineering
This AI Lets You Create Custom Anime Characters in Seconds.
Posted: Thu, 17 Aug 2017 07:00:00 GMT [source]
Top 10 Best Anime Girl Hairstyles
Drawing messy looking hair is not much different from other classic anime hairstyles. Generally the more hair clumps you add sticking out in random direction the more messy it will appear. Here’s a quick detour to show you how I draw the details. I have perfect control over each strand since I am not bothered by the other strands of hair.
Step 9
As with most such tutorial here on AnimeOutline the hair will be split into three parts to make the drawing process easier to manage. In the examples these are shown in red, green and blue but you can draw everything in regular pencil. Now mimic the shapes you used to create the front part of the hair to create additional hair beyond the fringe. Use thick, block-is chunks to create the front part of the hair. You can use both rectangular and triangular shapes to frame or obscure the face. Even though it does not necessarily have to only cover a part of the character’s face, you can think of this part as the fringe.
Steps
Try to imagine what the character would look like with a buzz cut as a way of determining the hairline. We can also add in the surrounding features, such as the ears to emphasize the hairline and where hair will fall once drawn in. Again, we want to start by drawing the face of the character, we can do so by establishing the shape of the face with grid lines for different features. Again, we want to start with the eyes to center the character’s features. As we draw in the hair of the character, starting with the fringe. We always want to draw the hair slightly floating above the scalp as this will suggest volume and height in the hair.
New Official Articles
Using your 2H pencil, lightly sketch the flat sides of the head. Draw a small ellipse under the line you drew in the previous step. For this section, we are going to learn how to draw our own head base to practice different styles on. Since anime is primarily drawn digitally, this tutorial will have two versions, a traditional version with the steps and video and a digital video process.
Keep experimenting with different light settings and hairstyles, and you’ll master the art of drawing anime hair. As mentioned at the start of the tutorial, messy looking hair is quite common in anime and manga. Sometimes it can be drawn this way to show that the hair has been “roughed up” and other times as just part of a character’s normal hairstyle. Quick tip – I want to draw shadows on the character’s forehead, formed by the bangs.
Recommended Articles
Copy the rhythm lines along the strands to make them more detailed. "Close" the shape of the strands by drawing a line from the tip of one rhythm line to just below the tip of the other. Finally, draw additional lines repeating the rhythm, simulating the spaces between thinner strands. In this step, we are going to work on the first layer of hair, determining the shape and length, whether the hair is straight or curly, and how large it is. Finally add some tiny shadows on the lower parts of the side clumps sicking out from the top/background section.
Draw the "helmet" to mark the distance from the head. Straight hair usually is not very voluminous, so you don't have to add a lot of distance. Imagine the hair as a single mass, and mark its edges. Lightly sketch the eyes, nose, and mouth to have a better reference for the hair.
Step 10
You should take a look at the image for a better perspective. The pig style of anime hair is very common in various series. And the back hair is divided into two ponytails to make it look charming. Messy hair is one of the most popular trends in anime along with trimmed anime hair. However, as she grew up, she instantly got trimmed hair that looked awesome. Matthew has been creating drawing and painting tutorials since the relaunch in 2020.
A lot of people get stuck while drawing hair and this is because most people don’t have the right design process. After drawing this hair, you will still see the hairline as most of the hair will go back. As we’ve already mentioned, you have to draw the front hair. Keeping two poodles that will contain three clumps on the right and two on the left one.
Let’s talk about how to draw anime hair for beginners. Now we should have a basic guideline sketch of how the face and hair work together to create a unique character design. This is where we can start working on some more refined sketching details to emphasize all the features of the anime character.
We want to know what our character will look like and how the hair can add to their overall aesthetic. We can begin with a simple drawing of a circle and grid to establish the different features. Let’s look at a more realistic hair formation, where we explore the potential of line work to bring emphasis to the structure of the hair. We want to look at how the character can be enhanced by the addition of a hairstyle, which can transform the overall aesthetic of the character. Hopefully the detailed guide provided in this tutorial has helped you gain a better understanding of how you can create such a hairstyle. Clean up the drawing by erasing the parts of the head covered by the hair once done.
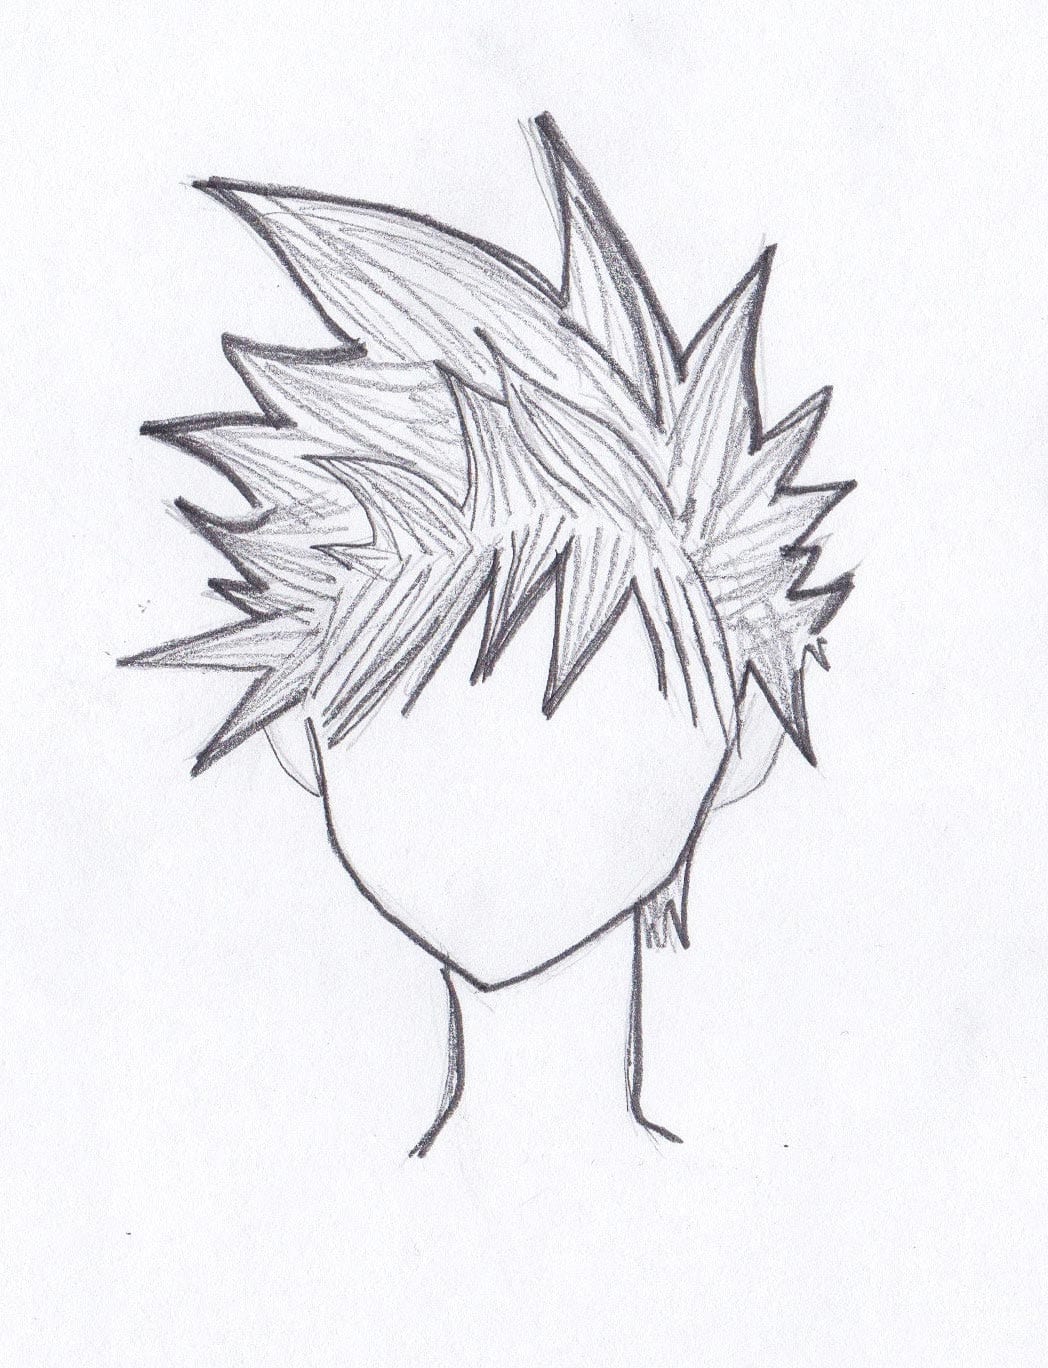
To draw anime hair, start by sketching the shape of your character’s head. Sketch a line where you want their hairline to be, usually about halfway between the brow line and the top of the head. Next, pencil in the character’s hair using simple lines and curves. Don’t worry about drawing every individual strand—just add a few lines or spikes here and there to suggest the shape of the locks and the texture of the hair. Experiment with giving your character bangs that hang over their eyes or hair that’s brushed back away from their forehead, depending on the look you’re going for. You can also try giving your character a ponytail or braids if you like.
This time around, I’m going to spend less time refining the sketch lines, since they’ll disappear when I start painting the hair. Unlike manga style, I don’t always want the lines to be visible. When I’m finished, I change the color of the sketch to dark orange. This will allow the outline to blend more easily with yellow tones of the hair, as opposed to the original black lines.
The middle portion should reach farther than the other hairs, giving it a totally unique look. We can erase the outline and start working on refining the sides with different shapes. Starting from the sides, we have to maintain steady curves to make sure that the hair is neat and clean. This will give a rather round shape to your anime hair. Moreover, from the middle, you have to draw a curve that will go as smoothly as possible.
Learn how to draw hair with Esseyli in this tutorial. Lastly, as a last resort to give it a little more shape, you could add in some highlights. These can be very simplistic light lines or shapes in the hair, which can work well to shape these types of vague anime hairstyles.


No comments:
Post a Comment