Table Of Content

However, if you approach a more cartoon-styled anime hair drawing, you will then be more loose and vaguer with your hair formation. This means you can keep lines a little less smooth and organic by drawing them quite geometrically around the head of the anime character. We will proceed to do a similar anime hair tutorial, where we look at how to draw boy anime hair step by step.
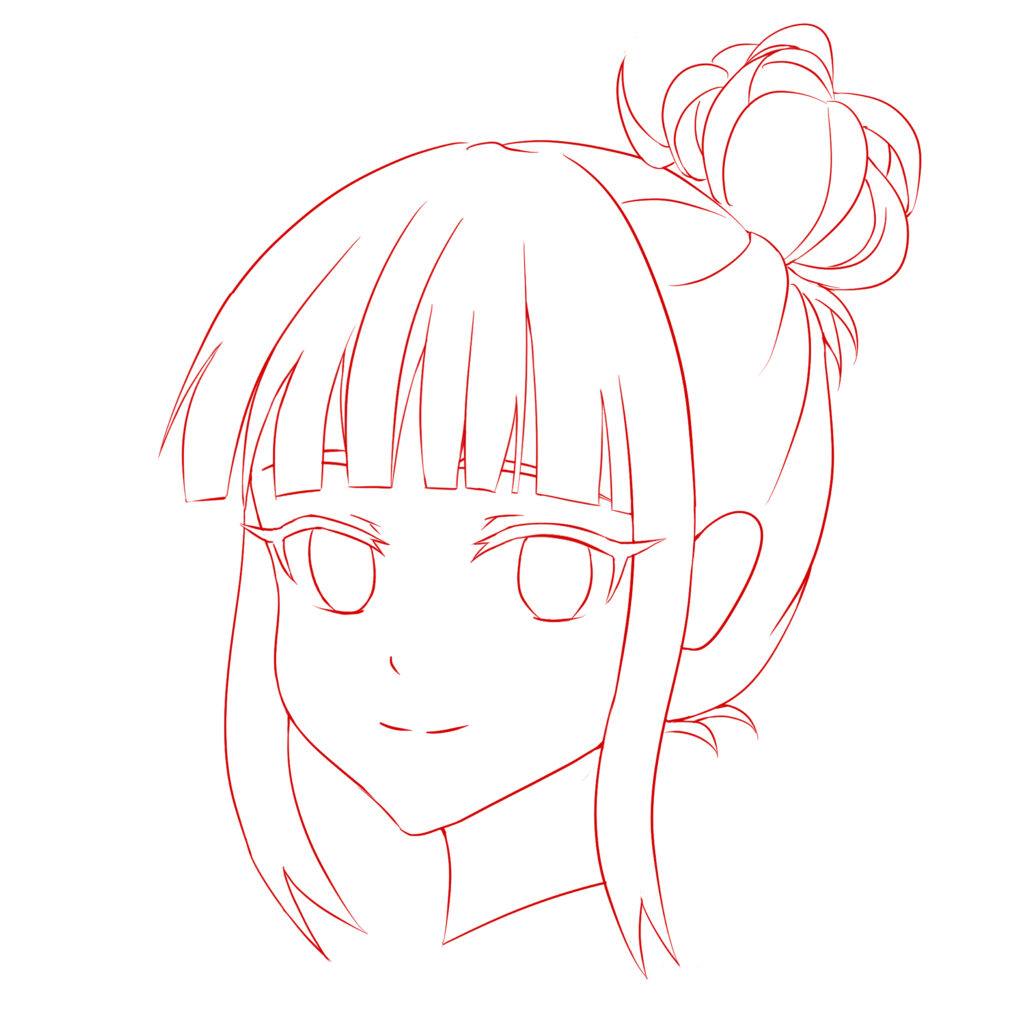
Step 3: Draw Final Line Art
This is because “Multiply” mode overlays the colors while darkening them. Here I notice that I still don’t really like the shape of the hair. Then I erase the unnecessary parts before merging the hair layer with the layer of the main part of the drawing containing the face. Once again, you have to start with the hairline and head.
Step 3
It can also be a little more difficult to draw than straight hair. This tutorial shows one way to draw such a hairstyle with a very detailed examples to make it easy to follow along. This tutorial shows how to draw curly anime or manga style hair. It consists of six steps with easy to follow examples as well as a video. Shading is a complex subject and can take years to master. However, I know that that some of you are eager to add a bit of shading to your anime girl drawings!
How to Draw Anime Hair for Beginners – A total Step by Step Guide
15 Anime Villains Who Are Master Manipulators - GameRant
15 Anime Villains Who Are Master Manipulators.
Posted: Mon, 06 Feb 2023 08:00:00 GMT [source]
We can also start making general strokes of strands that fall alongside the face. Once we have a basic sketch of the character we can now draw in the hairline. Drawing the hairline allows you to establish how the hair will form around the head and facial structure. We then can lightly erase that grid and use the ghost lines of that grid to help us establish features on the face. It’s always good to start with the eyes of the character, as well as forming the facial structure. Once all of the shadows are in place you should have a finished drawing of a curly anime/manga hairstyle.

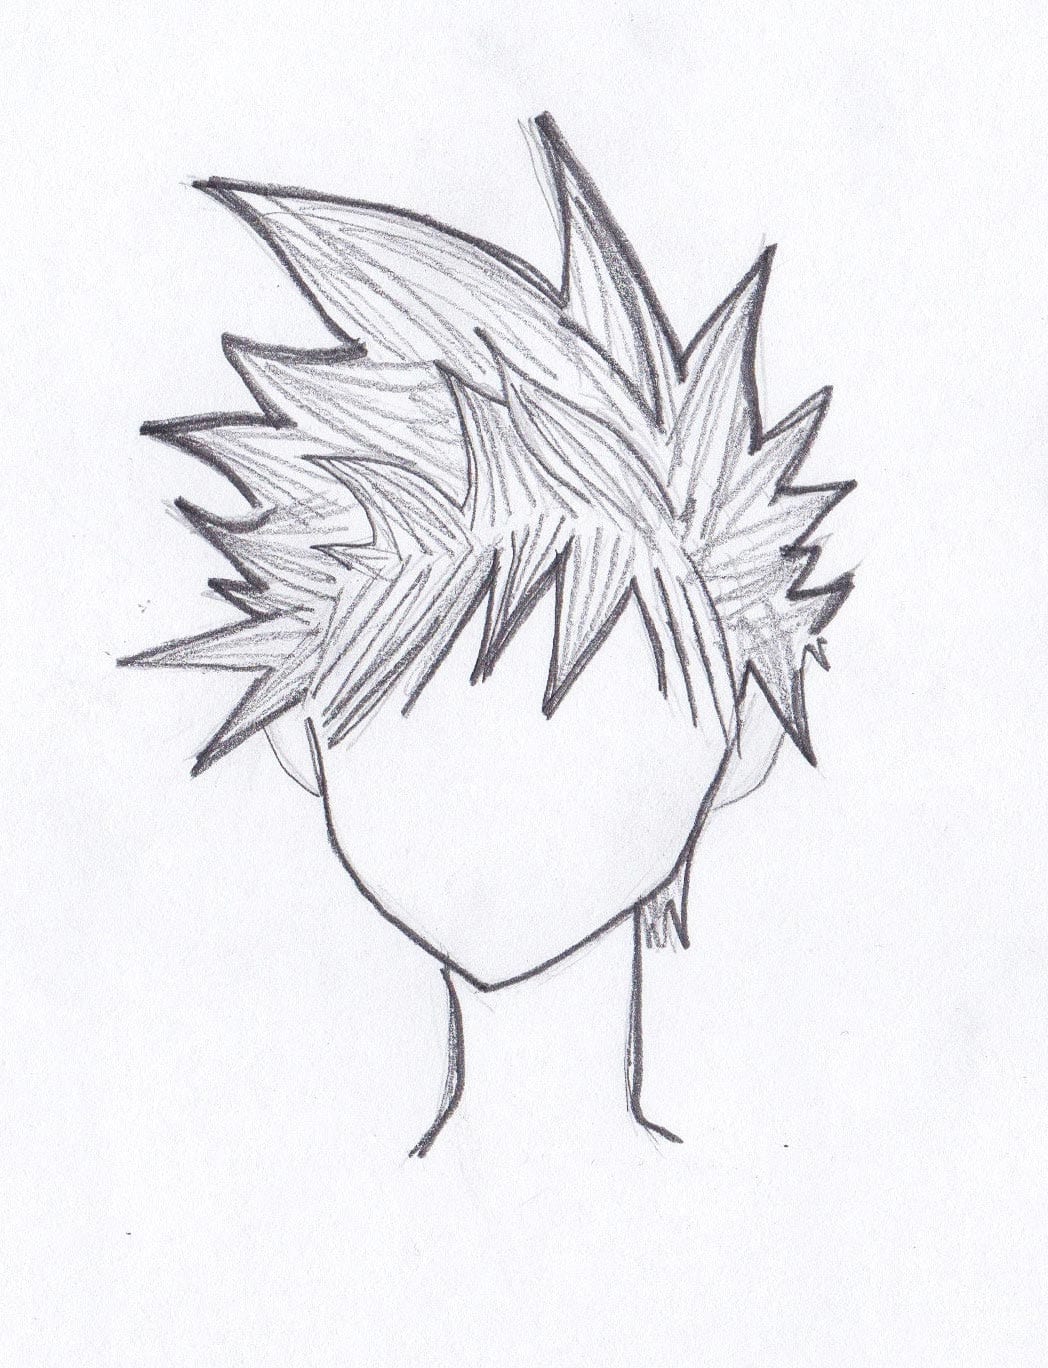
It’s tough to draw things when you don’t check what they look like in real life. Not just of anime drawings, but actual people as well. Because this hairstyle is so stylized, don't be afraid to use thick lines here. Because this hairstyle is very exaggerated, it's more suited to thick lines than the others were. You can accentuate parts of the lines to simulate shadows where the strands cross.
I create a layer just above it and select a darker color. Then, I get rid of the colored part at the bottom and move the shape down. I make the “Multiply” layer visible and I erase everything inside the selection. In many ways, anime characters can be androgynous-looking; therefore, it can be difficult to distinguish between male and female characters.
Alternative Male Anime Hair
If you are using a pencil, draw lightly with a hard grade scale pencil (like a 4H). The method employed here can be used to draw many other views and angles of hair, as well as other things. Maybe you’re still unsure how to draw hair even after this tutorial, but I don’t expect you to suddenly be a pro. Hair is a very complex subject to draw, because it's like a substance that can take many shapes and forms. Because of this, manga artists have developed a special method of simplifying hair.
Step 14
By doing this we create a better and more refined drawing with a more detailed layer of sketching. Pigtails are a very popular hairstyle for cute anime girls! Now, following your sketch, start working on the lines of the hair. In this tutorial, we’ll walk you through the construction process of a base head, the hairline, and three different hairstyles, step by step. Once all of the shadows are in place you should have a finished drawing of a messy anime/manga style hair. Next draw a few folds as a series of wavy lines running between the shoulders and the lower part of the head.
Because of the white background, though, all the little hairs are gone, so I take a slightly dark color and redraw them again to bring them back. Because the higher the contrast, the more the drawing will give an impression of photorealism. On the other hand, manga-style art is more tolerant of very saturated colors – bright, “flashy” colors.
However, the hairline can still give you a base to work on. Matthew Matthysen is an educated multidisciplinary artist and illustrator. He successfully completed his art degree at the University of Witwatersrand in South Africa, majoring in art history and contemporary drawing. The focus of his thesis was to explore the philosophical implications of the macro and micro-universe on the human experience. Matthew uses diverse media, such as written and hands-on components, to explore various approaches that are on the border between philosophy and science. For the side sections first shade the inner parts of the curls.
This step incorporates drawing different and messy hair clumps that will eventually go in the opposite direction. With various shapes and curves, the hair will look quite unique. The example in the image above explains the whole process neatly. Hence, splitting the hair into three parts can help us in a smooth process. This is a great way of giving an anime character a hairstyle without too much line work. It becomes a little more animated and cartoon with less realistic lines, but can work well with specific anime styles.
If you are curious about it, check out my post on it here. The top of it is hit by light, and it casts a shadow from the head down to the chest. Similarly, the shoulders and arms are hit by the light source from the top, so I shaded-in the bottom sections.
Be careful when drawing these lines inside the wavy strands, though—they may look too heavy with long lines inside. Instead, try to pick your pen/pencil up from time to time to make the lines less continuous. If you draw additional lines between them, you'll create nice, thick strands. The only curve appears where the hair falls on the shoulders.
The difference with realistic or semi-realistic styles is in the contrasts. When drawing in a manga style, we often avoid using shades that are too close to black. Just to clarify, I use the “Hard” airbrush, which is a good equivalent to the traditional brush found in other software. When you start out drawing, one of the trickiest things to get right is hair.
I also add light points in certain places to make them stand out and highlight specific strands. Just like with the manga style, I start by creating a new layer on top of the main drawing and draw the outline of the hair. Long hair is one of the most popular hairstyles when it comes to anime. As you can see in the example below, the hairstyle is cute and attractive.
We can also try to work with a more defined jawline, this way we give a more masculine quality to the anime character. Try to work a little on the features to make sure you are happy with them so that once we erase the drawing slightly, we have a good reference to work with. Play around with how you would like the hairline to fill in on the forehead of the anime character.